Windows 8: Installing Windows 7 with an Easy Windows 8 Recovery Option

Step 1:
Checking If Your Computer is Ready for Installing Windows 7
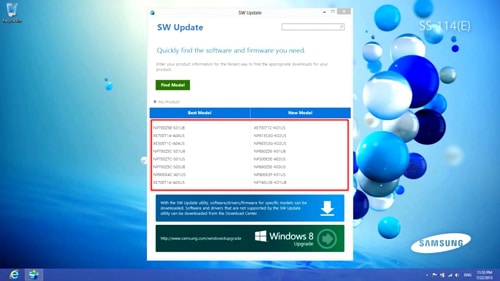
Run ‘SW Update’ → ‘Find Model’ →
Check out for Win 7 driver support information.
Step 2:
Updating Your Recovery Program to the Latest
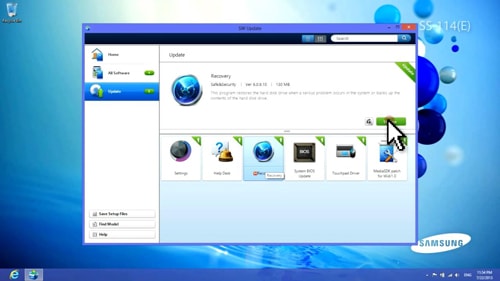
1. Run ‘SW Update’ → ‘Update’ menu → Select ‘Recovery’
→ Click ‘Update’.
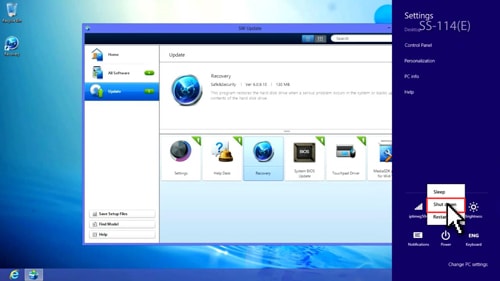
2. Open ‘Charm Bar’ → ‘Settings’ → ‘Power’ → 'Shut down’
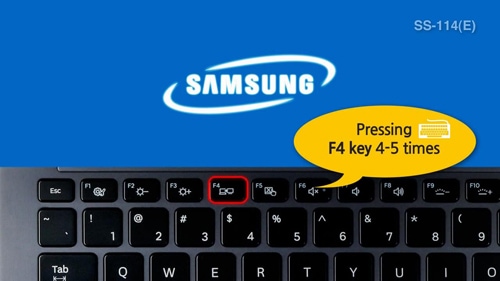
3. After system reboot, press 'F4' key 4-5 times to run ‘recovery’.
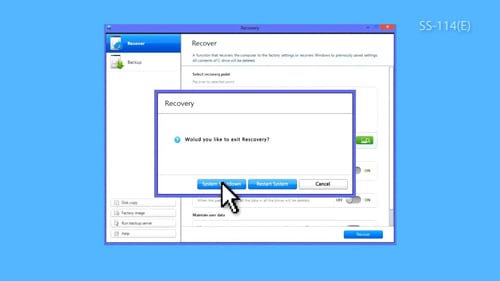
4. Click 'X (Close)' in the upper right corner of the 'Recovery' window
then click 'Shut down' button.
Steo 3:
Installing Windows 7
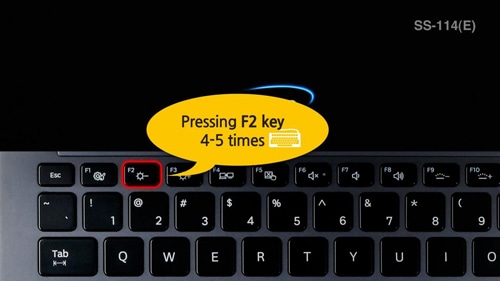
1. Turn the computer on, press 'F2' key 4-5 times to access the
'BIOS Setup'
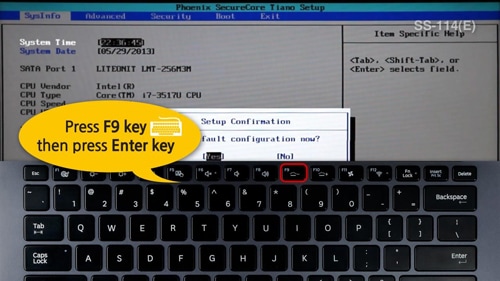
2. Press 'F9' key to initialize the 'BIOS' settings.
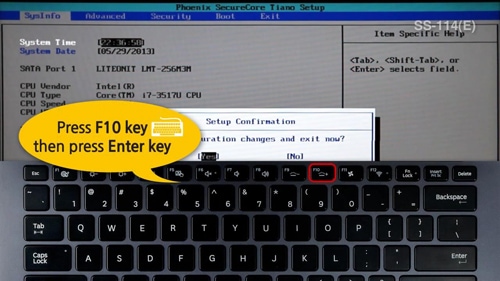
3. Press 'F10' key to save the 'BIOS' settings.
4. Immediately after the reboot, press 'F2' key 4-5 times to
access the 'BIOS Setup'.
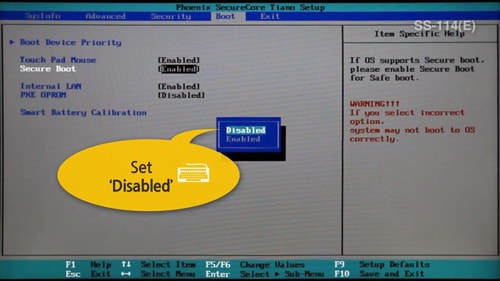
5. Go to ‘Boot’ → ‘Secure Boot: set to [Disabled]’.
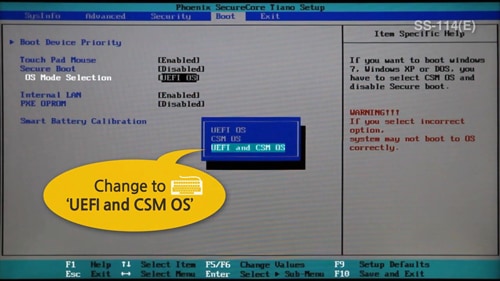
6. ‘OS Mode Selection’ → select ‘[UEFI and CSM OS]’.
7. ‘Advanced’ → ‘Fast BIOS Mode: set to [Disabled]’.

8. Put the Windows 7 DVD in your internal or external ODD.
9. Press 'F10' key to save the 'BIOS' settings.
10. Immediately after the reboot, press 'F2' key 4-5 times to
access the 'BIOS Setup'.
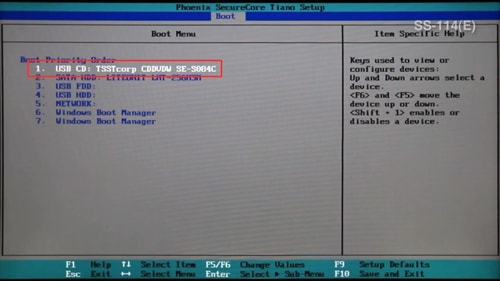
11. ‘Boot’ → ‘Boot Device Priority’ → Move the ‘USB CD’
to the top (number 1) position.
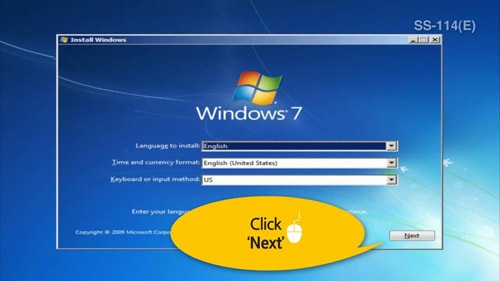
12. After the reboot, Windows 7 installation process continues.
Thank you for your feedback!
Please answer all questions.