How to troubleshoot a Galaxy phone that won't connect to a Wi-Fi network
When you have difficulty connecting to Wi-Fi on your phone, you need to check whether the Wi-Fi signal is not found or if the Wi-Fi network is found but cannot connect. Check out the guide below to successfully get your Wi-Fi network online.
Before you try the recommendations below, be sure to check if your device's software and related apps are updated to the latest version. To update your mobile device's software, follow these steps:
Step 1. Go to Settings > Software update.
Step 2. Tap on Download and install.
Step 3. Follow the on-screen instructions.
What to do if the Wi-Fi network is not detected?
There can be various reasons for the problem of not being able to connect to the Wi-Fi network normally. For example, the router may not be working properly or there may be an issue with your phone's network settings. Check out the guide below.
Check if the router is working properly. Make sure that it's powered on, connected to the Internet, and that your phone is within the router's Wi-Fi range. In addition, if too many devices are connected to one router, the Wi-Fi may not be detected.
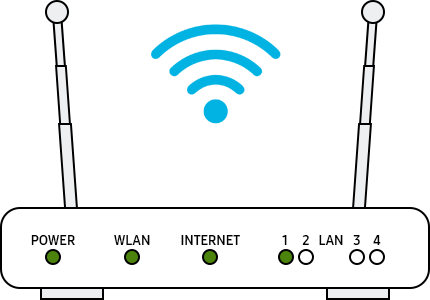
Note:
- The router display may vary from device to device. Check with your router provider.
Try restarting your Galaxy phone, router, and modem.
Step 1. To restart your phone, tap the Power icon in the Quick panel, then tap Restart.
Step 2. Turn your router and modem off and on again. When turning the router and modem off, unplug the power plug and plug it back in, and then turn on the power.
Step 3. After you restart each device, see if you fixed the issue.
Follow the steps below to reset the network settings and turn on Wi-Fi again.
Step 1. Go to Settings, and then select General management.
Step 2. Find and select Reset.
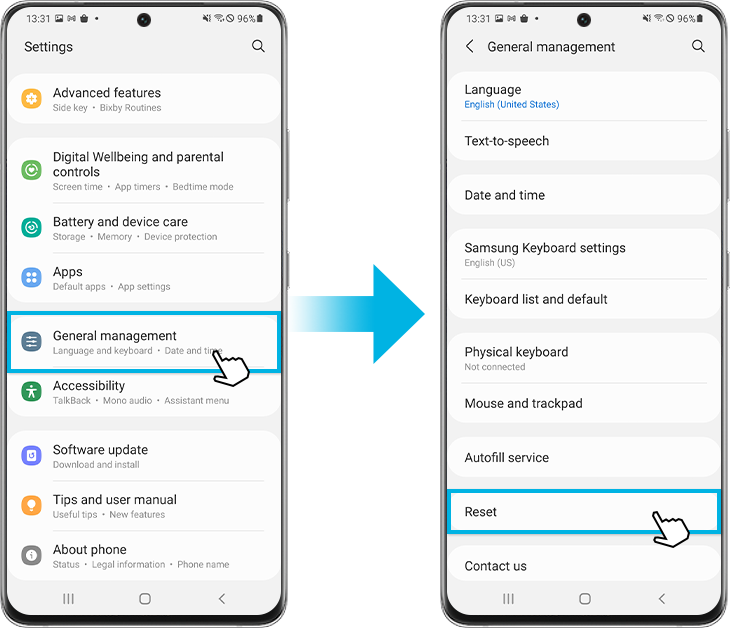
Step 3. Choose Reset network settings.
Step 4. Tap on the Reset settings button.
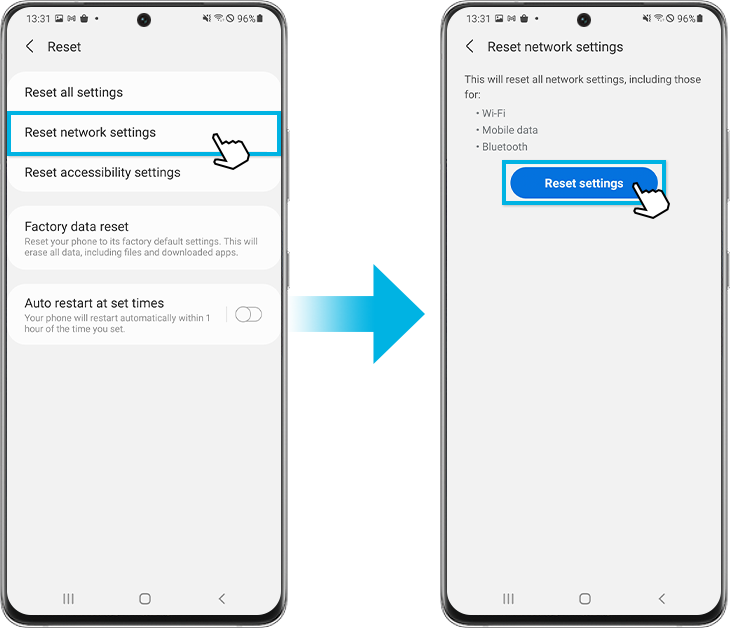
Step 5. Tap on the Reset button.
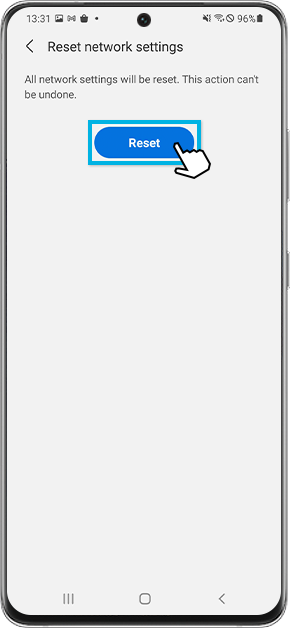
Note:
- When you reset the network settings, the Wi-Fi information, mobile data, and Bluetooth connection are reset.
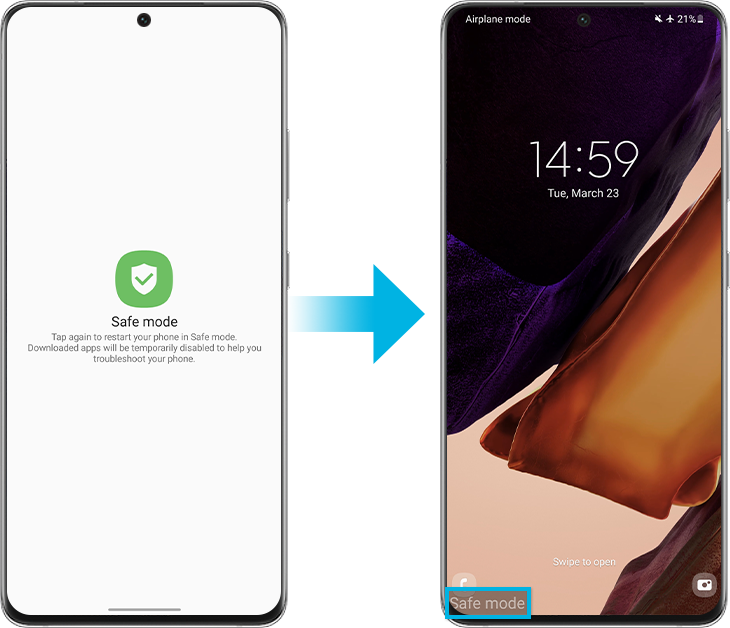
Try the Wi-Fi connection in Safe mode. If the Wi-Fi network is connected in Safe Mode, it may be a problem caused by the downloaded app on your phone, and that app should be uninstalled. To find which app causes a Wi-Fi issue, you can try uninstalling the apps in the order of the last installation.
Step 1. Open Quick settings. Tap the Power icon at the top of the screen.
Step 2. Touch and hold Power off until the Safe mode icon is displayed.
Step 3. Tap Safe mode to start your device in Safe mode. If you've entered Safe mode successfully, you will see Safe mode displayed at the bottom of the screen.
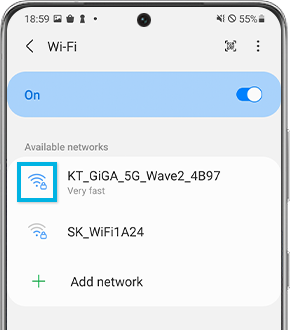
If there is a lock mark inside the Wi-Fi network icon, it is a password protected network. When entering the password, be careful and enter it correctly. Wi-Fi passwords are case-sensitive.
If the above methods do not work, you may bring your device back to the factory default settings just like when you powered on your device for the first time.
Step 1. Go to Settings, and then select General management.
Step 2. Select Reset, and then tap on Factory data reset.
Step 3. Scroll down the page and tap on the Reset button.
Step 4. Tap on the Delete all button.
Note:
- Factory data resetting a mobile device is not reversible.
- Make sure that all of your information is saved to a backup somewhere else before attempting to reset your phone.
Note:
- If you're connected to a Wi-Fi network but cannot get online, try using the Wi-Fi network on another device. If other devices also cannot access online, that network service may be faulty, so contact your Internet provider for help.
- Device screenshots and menus may vary depending on the device model and software version.
Thank you for your feedback!
Please answer all questions.
